
Installing Arduino
Get the latest version from the download page. You can choose between the Installer (.exe) and the Zip packages. We suggest you use the first one that installs directly everything you need to use the Arduino Software (IDE), including the drivers. With the Zip package you need to install the drivers manually. The Zip file is also useful if you want to create aportable installation.
When the download finishes, proceed with the installation and please allow the driver installation process when you get a warning from the operating system.
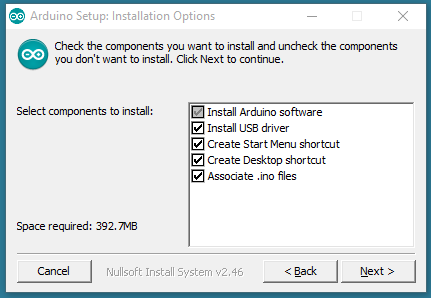
Choose the components to install
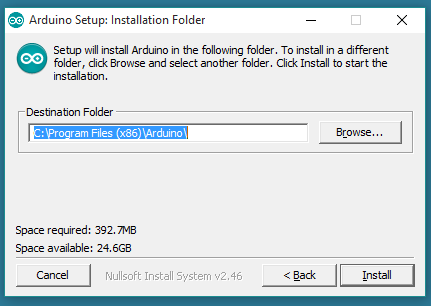
Choose the installation directory (we suggest to keep the default one)
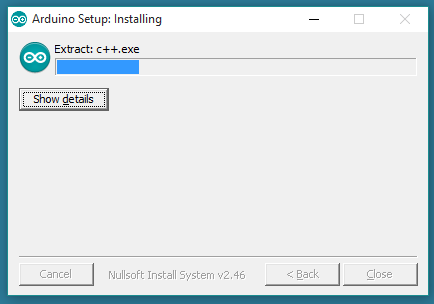
The process will extract and install all the required files to execute properly the Arduino Software (IDE)
Installing the ESP8266 Arduino Addon
There are a variety of development environments that can be equipped to program the ESP8266. You can go with a simple Notepad/gcc setup, or fine-tune an Eclipse environment, use a virtual machine provided by Espressif, or come up with something of your own.
Fortunately, the amazing ESP8266 community recently took the IDE selection a step further by creating an Arduino addon. If you’re just getting started programming the ESP8266, this is the environment we recommend beginning with, and the one we’ll document in this tutorial.
This ESP8266 addon for Arduino is based on the amazing work by Ivan Grokhotkov and the rest of the ESP8266 community. Check out the ESP8266 Arduino GitHub repository for more information.
Installing the Addon With the Arduino Boards Manager
With the release of Arduino 1.6.4, adding third party boards to the Arduino IDE is easily achieved through the new board manager. If you’re running an older version of Arduino (1.6.3 or earlier), we recommend upgrading now. As always, you can download the latest version of Arduino from arduino.cc.
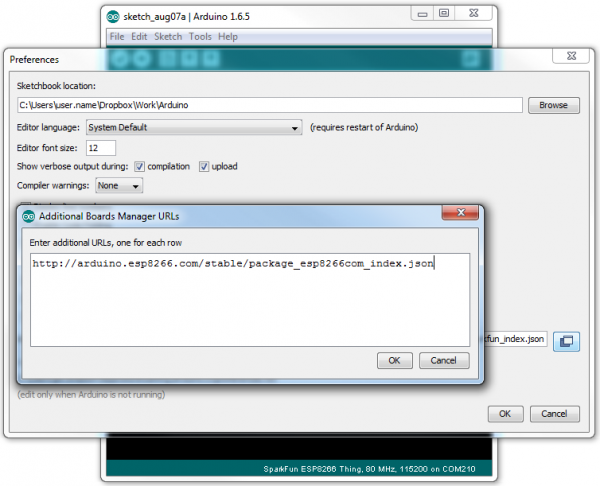
To begin, we’ll need to update the board manager with a custom URL. Open up Arduino, then go to the Preferences (File> Preferences). Then, towards the bottom of the window, copy this URL into the “Additional Board Manager URLs” text box:
http://arduino.esp8266.com/stable/package_esp8266com_index.json
If you already have a URL in there, and want to keep it, you can separate multiple URLs by placing a comma between them. (Arduino 1.6.5 added an expanded text box, separate links in here by line.)
Hit OK. Then navigate to the Board Manager by going to Tools > Boards > Boards Manager. There should be a couple new entries in addition to the standard Arduino boards. Look for esp8266. Click on that entry, then select Install.
You need to install 2.3.0 version of esp8266 library.
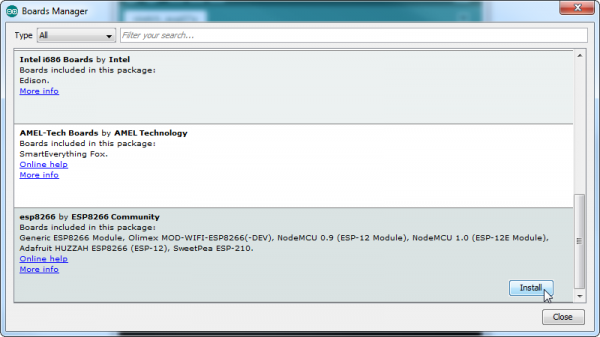
The board definitions and tools for the ESP8266 Thing include a whole new set of gcc, g++, and other reasonably large, compiled binaries, so it may take a few minutes to download and install (the archived file is ~110MB). Once the installation has completed, an Arduino-blue “INSTALLED” will appear next to the entry.
Selecting the ESP8266 Thing Board
With the Board addon installed, all that’s left to do is select “ESP8266 Thing” from the Tools > Boards menu.

then select your FTDI’s port number under the Tools > Port menu. İf you do not see com port, you need to install driver s software by using the following button.
ESPcopter Driver
If you are using mac diveces and espcopter is not list in your post list, you need to do following steps.
- Shut Down
- Hold
mac+ R during boot to enter recovery mode - Open a terminal
- type
spctl kext-consent disableand press enter - Reboot
- Go to “System Preferences” -> “Security & Privacy”
- In the bottom of the window, you will see a message “System software from developer “SiLabs” was blocked from loading.”
- Click on “Allow” button
- Restart your Mac
- Now my device is listed as
/dev/cu.SLAB_USBtoUARTand everything work as expected.